HexoStepByStep
Hexo 安裝步驟:
macOS 環境 , 並假設已安裝好 VScode:
官方的命令列指令,出現錯誤:
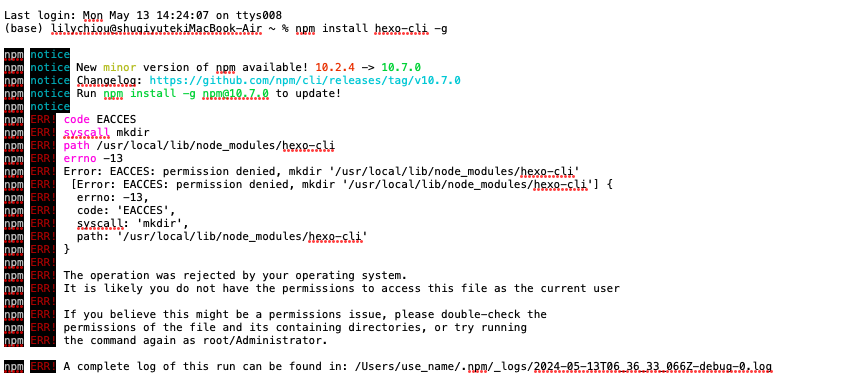
用 super user 權限安裝 hexo-cli :
1 | $ sudo npm install hexo-cli -g |

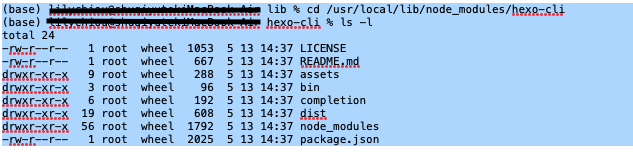
安裝好的 hexo-cli 放在這 :
初始化專案
1 | $ sudo hexo init "你的專案名稱" |

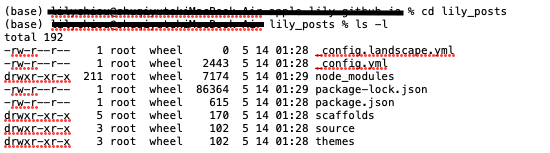
切換到 “你的專案名稱” 查看一下 (我的專案是 lily_posts)
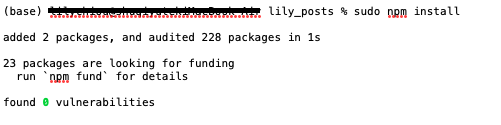
在專案目錄底下執行 npm install ,安裝專案(我是用 super user執行)
1 | $ sudo npm install |
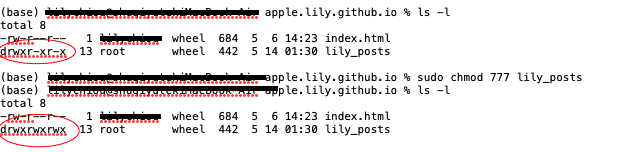
然後在編輯設定檔之前 ,先賦予使用者權限「讀寫及檔案擁有者」,否則vscode 無法存檔
1 | $ sudo chmod 777 "你的專案名稱" |
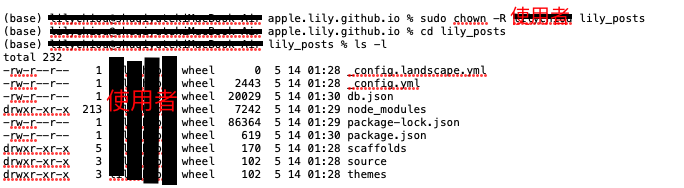
1 | $ sudo chown -R "使用者名稱" "你的專案名稱" |
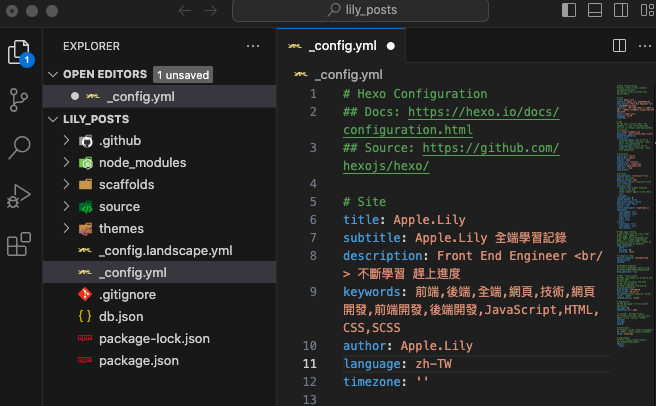
進入 VScode 打開專案目錄 修改 hexo/.config.yml
測試 部署一篇文章
1 | $ hexo new "如何部署Hexo" -p "hexo/page/title" |

執行 hexo server , 啓動server , 是否有成功看到網頁
1 | $ hexo server |

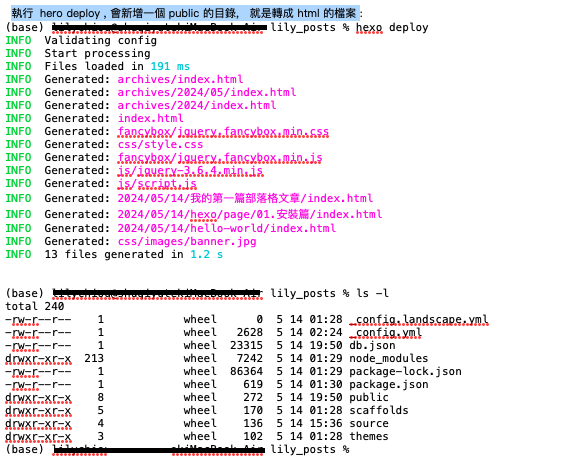
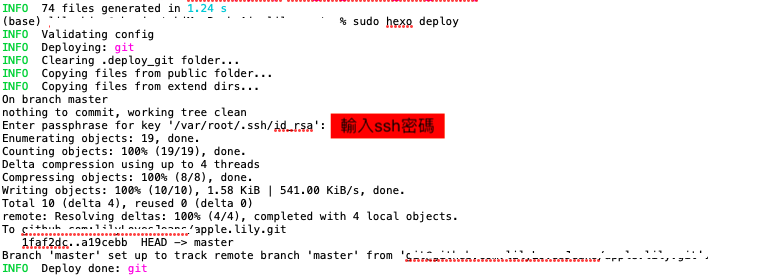
部署靜態網頁,執行 hero deploy , 會新增一個 public 的目錄, 就是轉成 html 的檔案
1 | $ hexo deploy (也可簡寫 hexo -d) |
下載nexT theme, 簡約強大
1 | $ sudo git clone https://github.com/next-theme/hexo-theme-next themes/next |

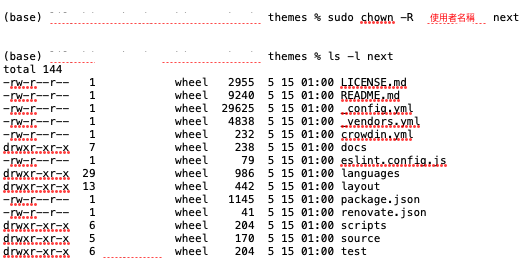
切換到 themes的目錄,賦予權限
1 | $ chown "使用者名稱" next |
在專案目錄下,新增 about 頁面
1 | $ hexo new page about |

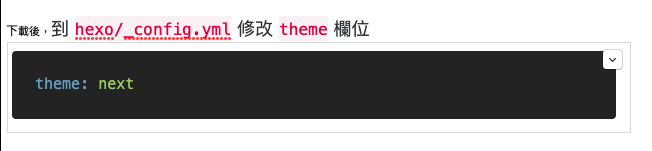
下載後,到 hexo/_config.yml 修改 theme 欄位
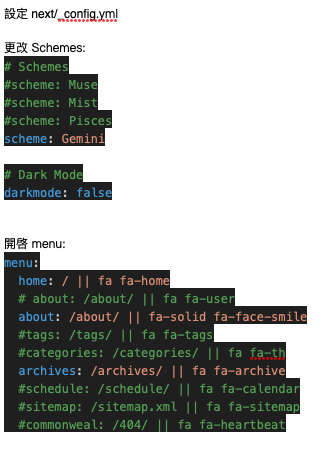
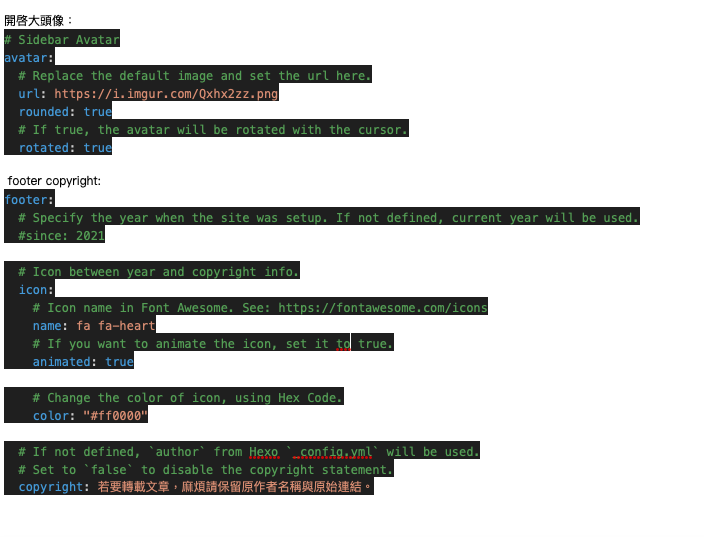
修改 next/_config.yml
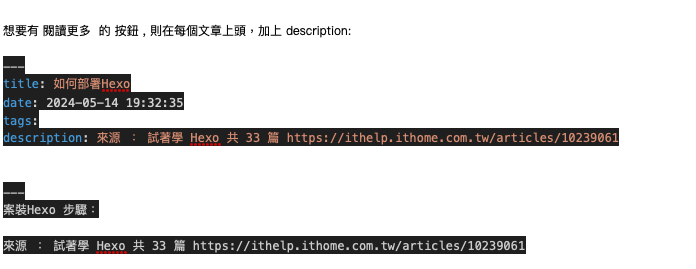
新增 read more 按鈕
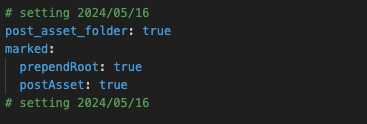
要於建立 post 時,順便建立相同名稱的子目錄, 須修改 hexo/_config.yml
先設定金鑰,在 deploy 至 Github SSH之前
很早就設定好,沒有筆記,參考連結:
https://ithelp.ithome.com.tw/articles/10205988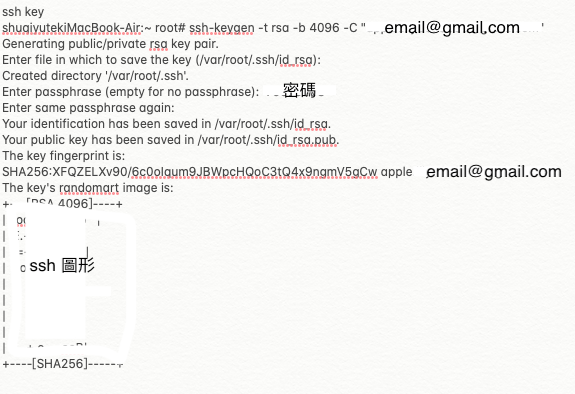
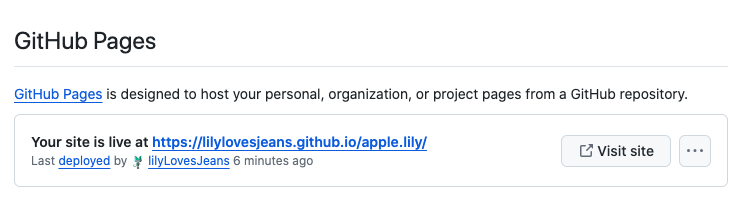
deploy 至 Github , 先設定 Github pages
(11) 試著學 Hexo - 部署你的第一個部落格:
https://ithelp.ithome.com.tw/articles/10242893
設定好之後就可以執行 hexo deploy
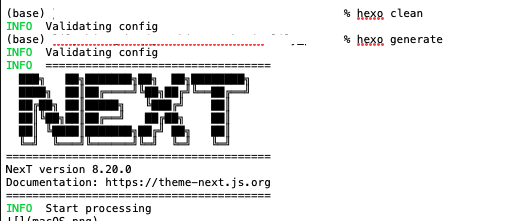
1 | $ hexo clean |
git pages 查看網站連結,點選之後看看是否正常:
文獻連結:
試著學 Hexo https://ithelp.ithome.com.tw/articles/10236742?sc=iThelpR by
Ray
用 Hexo + Github Pages 搭建免費個人部落格(五): https://shangoyanyi.medium.com/%E7%94%A8-hexo-github-pages-%E6%90%AD%E5%BB%BA%E5%85%8D%E8%B2%BB%E5%80%8B%E4%BA%BA%E9%83%A8%E8%90%BD%E6%A0%BC-%E4%BA%94-45d5390af950 by
shangoyanyi
設定 Github SSH 金鑰 feat. Github SSH、HTTPS 的差異:https://ithelp.ithome.com.tw/articles/10205988 by 六角學院